
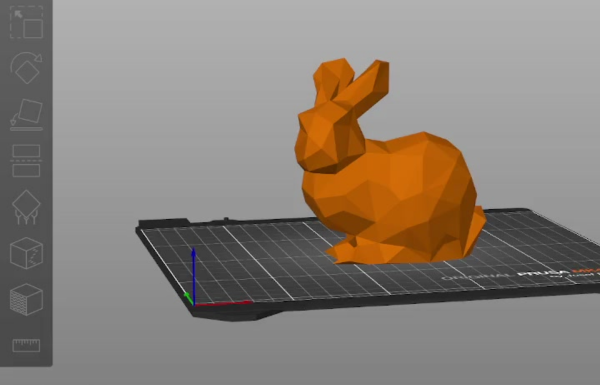
Welcome to Part 1 of a series on basic 3D printing tips! This series will focus on PrusaSlicer, the software designed by Prusa Research. DKPL’s makerspace uses Prusa brand 3D printers, but PrusaSlicer can also work with non-Prusa brand printers. Additionally, the tips here apply all across the board, so if you use a different slicer or have another brand of printer, worry not—this is still the blog for you!
In Part 1, we’re going to take a look at the most important part of any 3D print: the first layer. If done improperly, failure is all but guaranteed. If done well, you’re on the road to consistent success.
There are two aspects to ensuring a solid first layer: z-axis calibration and a flat base. For the sake of brevity, this blog will focus on making sure your model has a flat base touching the buildplate. If you’re a regular at DKPL’s Open Labs (or have a 3D printer at home that also does automatic z-level calibrations), there’s no need to worry about the z-axis. If you have another type of 3D printer at home and want to learn more about calibration, feel free to contact the Tech Desk, and we can set up an appointment to go over some basics (contact information is at the bottom of this post).
The first thing to check is the base of your 3D print: is it flat?
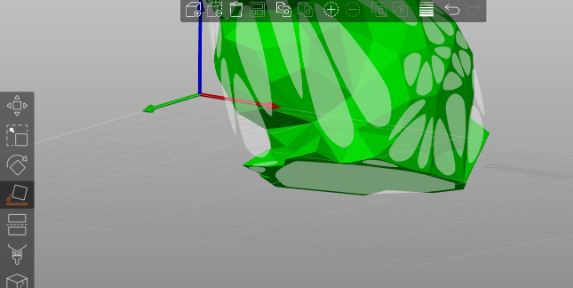
PrusaSlicer has an excellent tool called “Place on Face” that allows you to put place a 3D model on any of its “faces”. Ideally, the 3D print will have a base that is wide and completely flat. The model below does not, as shown by how many “faces” show on its base. This model will not have a smooth first layer.
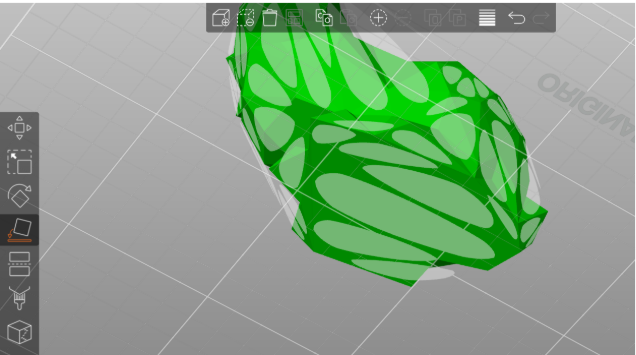
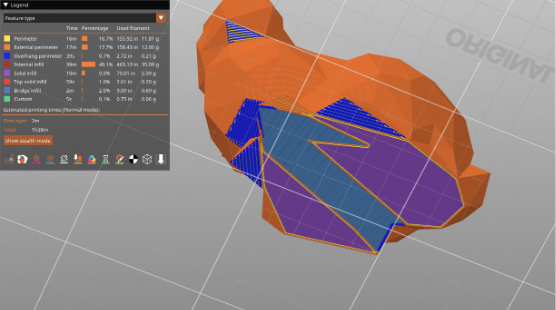
Here’s the sliced result for this model. Note the light blue. This is ”bridging”. On higher layers, filament “bridging” between two points is generally fine. However, if it’s on the bottom of a print, it means that subsequent layers are stacking on top of an extremely weak base. You never want to see “bridging” or “overhang perimeter” on the bottom of your print. It will almost always lead to failure.
So then, how do we ensure a flat, smooth base and set this model up for success?
PrusaSlicer comes to the rescue with another wonderful tool, located just below “Place on Face”. The “Cut” tool allows a user to literally ‘cut’ off parts of the model. In this case, we would cut off a very small amount on the bottom of the model. It isn’t enough to make the model noticeably smaller—in this case, it’s no more than a few millimeters. Even such a small amount can still lead to a large change.
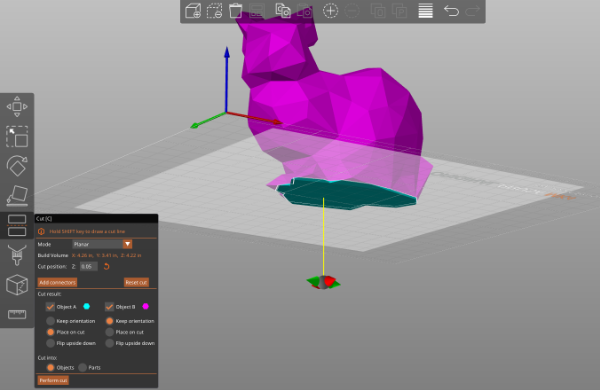
After cutting off the very bottom, we can use “Place on Face” again to see just one face on the bottom. This means the bottom of the print is flat, which is what we want to see!
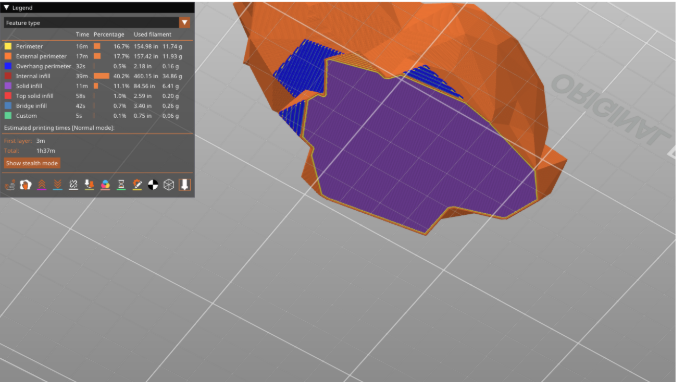
Here’s the sliced result with that single face. Note how the entire bottom is purple (aka ”solid infill”). This doesn’t mean the print will never fail, but it puts you in a much better position for success.
Remember: Always check the bottom of your model for a flat base. If it isn’t perfectly flat on the buildplate, there won’t be anything keeping it steady while it prints, and you’re likely to end up with a tangle of filament rather than a clean and shiny model.
Questions? Comments? Want to set up a one-one-one session to get more in-depth knowledge? Contact the Tech Desk at [email protected] or (815) 756-9568 ext. 2851. Also, make sure to come to Open Lab in 309 Creative to put your new knowledge to work! Open Labs are every week on Tuesdays (5-8), Fridays (9-12), and Saturdays (9-12).
Look forward to the next part of this series, where we’ll be going over the other major aspect of successfully printing a model: supports!