
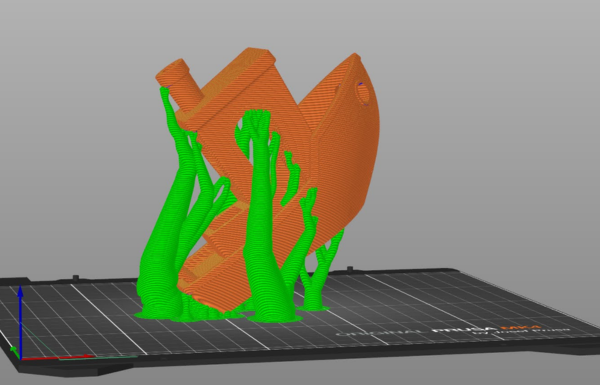
Welcome back to the 3D printing tips blog series! This series will focus on PrusaSlicer, the software designed by Prusa Research. DKPL’s makerspace uses Prusa brand 3D printers, but PrusaSlicer can also work with non-Prusa brand printers. Additionally, the tips here apply all across the board, so if you use a different slicer or have another brand of printer, worry not—this is still the blog for you!
In Part 2, we’ll be looking at another crucial aspect of print success: supports. Not every print needs them, but if you leave them off when they are needed, you’re guaranteed to get a tangled mess of failure. Luckily, PrusaSlicer makes the process easy.
Supports are used to, quite literally, support a model as it’s being printed. Models are printed layer by layer, so if there’s a layer that hangs over empty space, it needs something beneath it. That’s where supports come in.
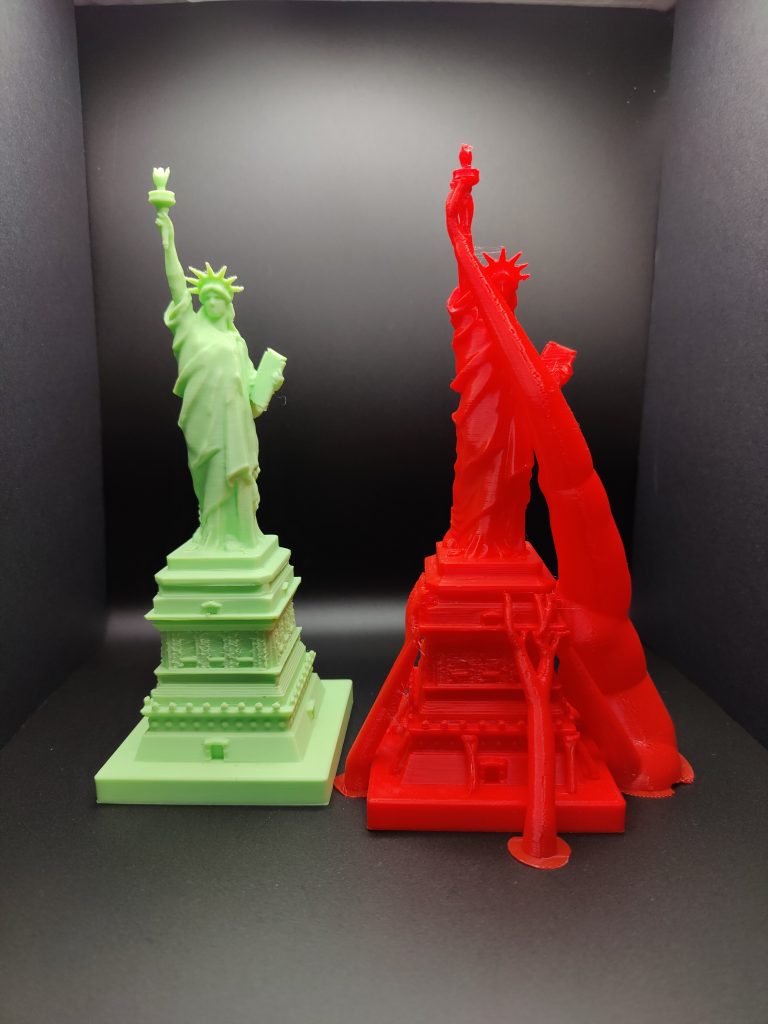
On the left, you can see the Statue of Liberty without supports. On the right is how the same model appears when it’s fresh off the printer. Notice all those twisty branches climbing up Lady Liberty? The ones on the bottom added a pillar for the building as it printed, and the largest branch made sure that her torch didn’t collapse.
In general, supports come off easily once a print is completed. They’re designed to snap off the parts they held up, though sometimes you’ll need a pair of clippers to get them off, especially on a small print. Now, how do you get these supports to generate in PrusaSlicer?
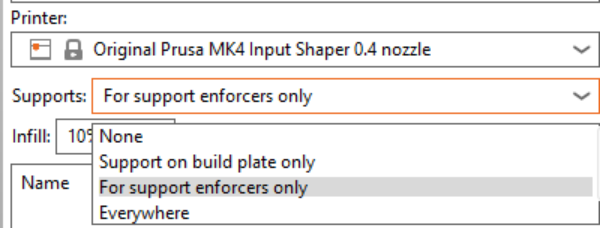
The first thing you’ll do is select “For support enforcers only” from the menu on the right-hand side. This means that supports will only generate where we tell them to.
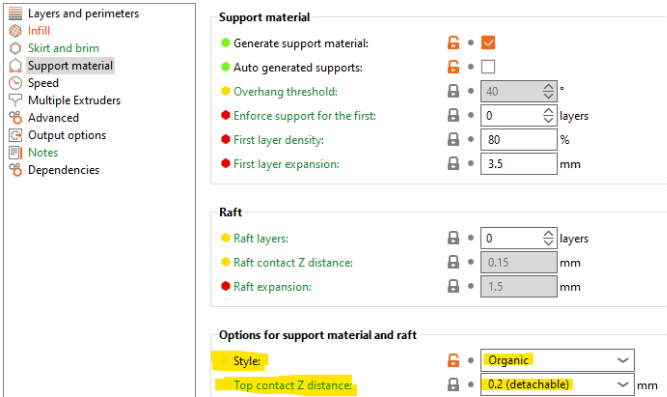
Then navigate to “print settings” and find the “support material” submenu. Though other styles work well, I recommend using the “Organic” support style. These are the easiest to take off and as a rule, generate the least waste. You also want to make sure that the top contact Z distance is set to a “detachable” setting, as shown below. This is usually the default, but if the distance is lower, it will be much more difficult to take the supports off.
Now for the final step: Go to the menu on the left-hand side of the slicer and select the icon of a square with supports beneath it. You can use this to literally “paint on” supports by hand, though there’s an even simpler option available: automatic painting. Click this, and PrusaSlicer will automatically detect the angles of your model and mark areas that require support. Automatic painting uses the minimum necessary surface area for supports, which reduces both waste and the challenge of post-printing removal.
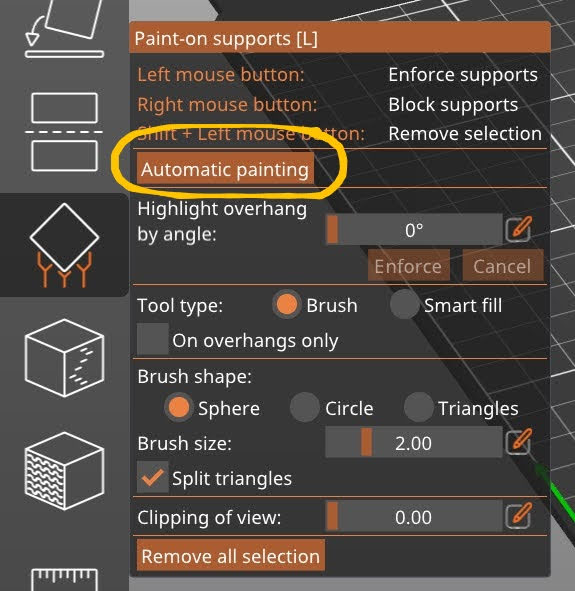
And just like that, you’re done! PrusaSlicer will generate the necessary supports, and your print won’t turn into a “tumbleweed” of loose filament. Always remember to check if you need supports before printing. You may not be able to tell on early layers, and it’s always frustrating to realize your print needs supports when it’s already halfway done. Follow these steps with every print, and you’ll save yourself time and worry. If you’re interested in learning more, check out this post on support material from the Prusa Knowledge Base.
Questions? Comments? Want to set up a one-one-one session to get more in-depth knowledge? Contact the Tech Desk at [email protected] or (815) 756-9568 ext. 2851. Also, make sure to come to Open Lab in 309 Creative to put your new knowledge to work! Open Labs are every week on Tuesdays (5pm-8pm), Fridays (9am-12pm), and Saturdays (9am-12pm).
Look forward to the next part of this series, where we’ll be going over ways to speed up printing by adjusting layer height & infill! If you’re just getting into this blog series, you can find the previous entry here and learn about how to ensure a solid first layer.