
What happened to the cat who ate a ball of yarn?
She had mittens!
Hello, DeKalb kids and parents! It is Miss Julie here, bringing news of our new Crochet Club. So many of you have mentioned to me that you would be interested in a crochet club, so here it is. Actually, this was supposed to happen back in April, and it was supposed to be in-person, but hey… we’ll do the best we can.
So here’s how this is going to work. Starting today, I am posting a teaching video that will instruct you in a new stitch and/or project. Then, the following week, I will host a Q&A Zoom session to answer any questions you may have. To make sure that you don’t miss any videos or Zoom meetings, request to join my new Facebook group just for kids and parents called DKPL’s Crafty Corner. I will post reminders, Zoom information, and updates on other craft projects, too.
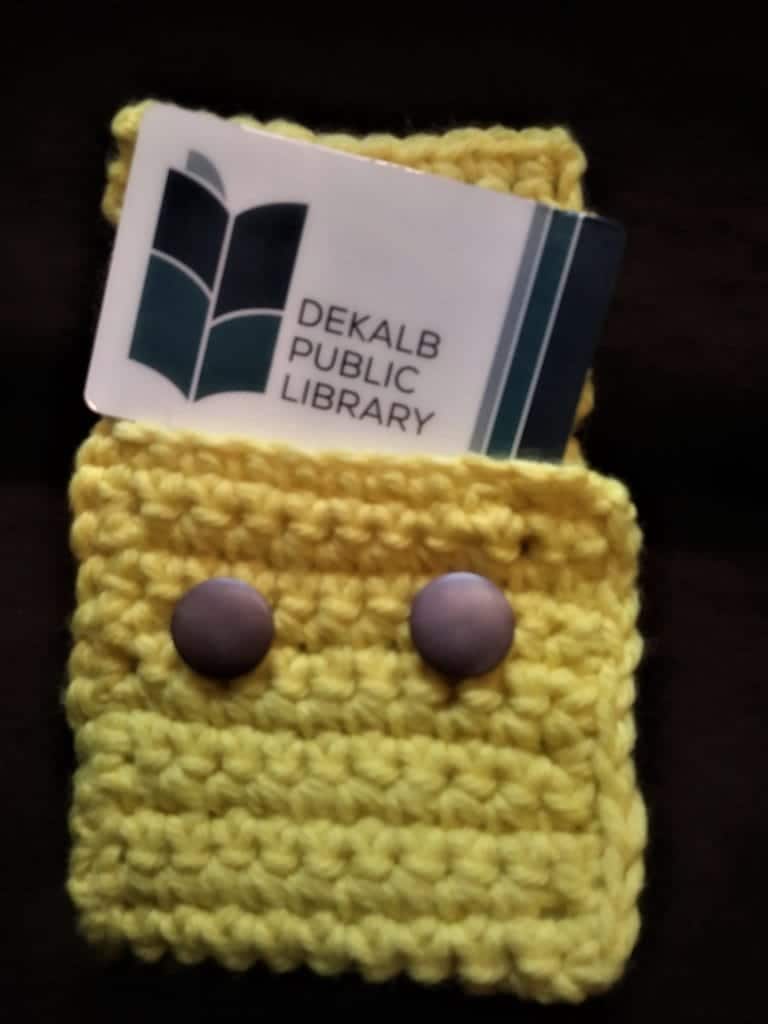
The first project we are going to do is… a library card holder! Really, did you expect anything else? I do love my library card, and it deserves its own cozy holder!
Here is the pattern in plain language:
1. Make a slipknot.
2. Chain 10.
3. Chain one more (this loop will make the side of the holder.
4. Into each of the original 10 chains, crochet one “single crochet” stitch. It will look like you are skipping a stitch. What you are skipping is the extra “chain” at the end of the row. You only want to crochet into the original 10 chains.
5. End the row by adding one chain.
6. Turn your work.
7. Again, skip the “chain” that you just made, and “single crochet” into each of the “single crochet” spots from the previous row.
8. Finish the row with a chain.
9. That makes two rows. You need 30 more that are just like the previous two. Don’t worry… once you get the hang of it, it will go quickly.
10. At the end of the last row, do not chain. Instead, pull the yarn through the last stitch to make a knot. Leave the yarn long enough to weave in.
11. Weave in the yarn from the beginning and final knots.
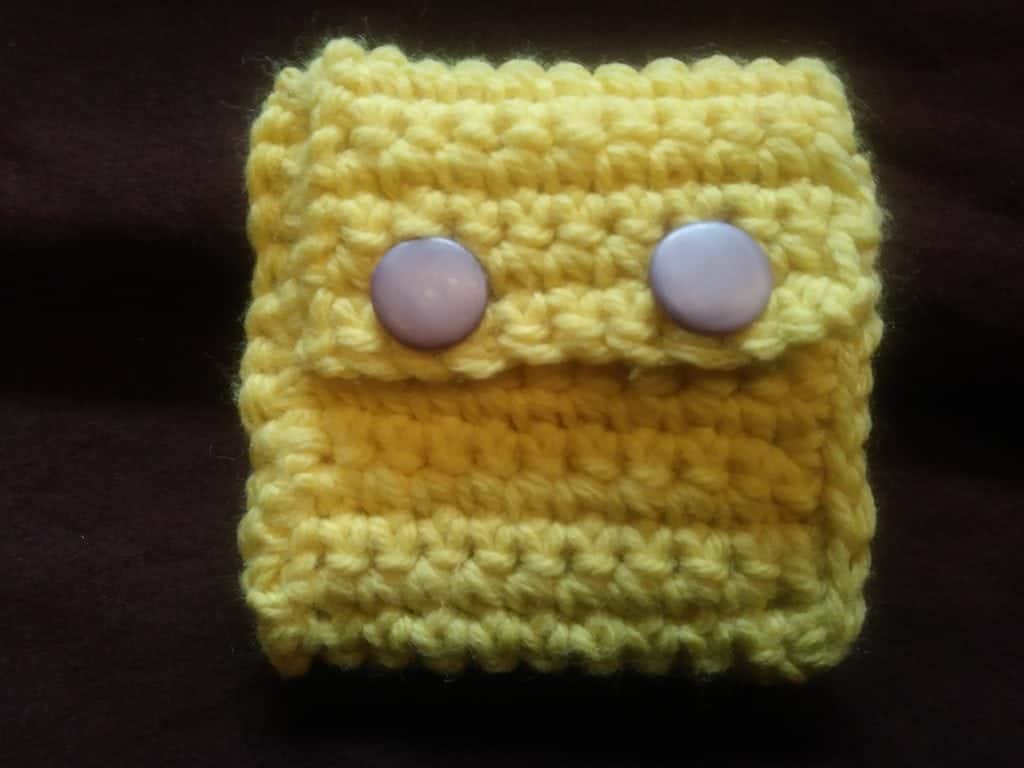
12. Fold up the material so that it looks like a pouch.
13. Sew or single crochet the sides shut.
14. Attach two buttons to the front, and viola! You are finished.
Here is the same pattern, but written in the typical crochet shorthand:
1. Ch10, +1, turn.
2. Row 1: Sc10 starting in second ch from hook, ch1, turn
3. Rows 2-31: Sc10, ch1, turn
4. Row 32: Sc10, bind off. weave in ends.
5. Form material into a pouch.
6. Sew or sc sides. Weave in ends.
7. Sew buttons on front.
Isn’t that fun? It is like knowing a secret code!
What do you call the steps it takes to crochet a project?
A chain of events!
As you can clearly see, one of the great things about not meeting in person is that you are spared having to listen to all my jokes!
When you are done with your project, I would love to see it and even post it for others to enjoy. There are several ways to submit work to me:
1. Email me at [email protected].
2. Post directly to DKPL’s Crafty Corner. I do monitor the posts, so yours may not show up until the next time I am on Facebook.
Have fun, everyone!